Wednesday, October 26, 2011

Introducing Android WebDriver

[This post is by Dounia Berrada, an engineer on the EngTools team. — Tim Bray]

Selenium WebDriver is a browser automation tool which provides a lightweight and elegant way for testing web apps. Selenium WebDriver is now available as an SDK extra in the Android SDK, and supports 2.3 (Gingerbread) and onwards!

Whether or not your site is optimized for mobile browsers, you can be sure that users will be accessing it from their phones and tablets. WebDriver makes it easy to write automated tests that ensure your site works correctly when viewed from the Android browser. We’ll walk you through some basics about WebDriver and look at it in action.

WebDriver Basics

WebDriver tests are end-to-end tests that exercise the web application just like a real user would. WebDriver models user interactions with a web page such as finger flicks, finger scrolls and long presses. It can rotate the display and interact with HTML5 features such as local storage, session storage and the application cache. Those tests run as part of an Android tests project and are based on Junit. They can be launched from Eclipse or the command line. WebDriver tests can be wired with a continuous integration system and can run on phone and tablet emulators or real devices. Once the test starts, WebDriver opens a WebView configured like the Android browser and runs the tests against it.

WebDriver is an Android SDK extra and can be installed following these instructions. Once you’ve done that you’ll be ready to write tests! There is a comprehensive WebDriver user guide on the Selenium site, but let’s start with a basic example using www.google.com to give you a taste of what’s possible.

Getting Started

First, create an Android project containing an empty activity with no layout.

public class SimpleAppActivity extends Activity {
@Override
public void onCreate(Bundle savedInstanceState) {
super.onCreate(savedInstanceState);
}
}

Then create the Android test project that will contain the tests. WebDriver will create the WebView and set the layout automatically in the main Activity.

Let’s write a test that opens the Google home page on Android and issues a query for “weather in San Francisco”. The test will verify that Google returns search results, and that the first result returned is giving the weather in San Francisco.

public class SimpleGoogleTest extends ActivityInstrumentationTestCase2<SimpleAppActivity> {

public void testGoogleShouldWork() {
// Create a WebDriver instance with the activity in which we want the test to run
WebDriver driver = new AndroidDriver(getActivity());
// Let’s open a web page
driver.get("http://www.google.com");

// Lookup for the search box by its name
WebElement searchBox = driver.findElement(By.name("q"));

// Enter a search query and submit
searchBox.sendKeys("weather in san francisco");
searchBox.submit();

// Making sure that Google shows 11 results
WebElement resultSection = driver.findElement(By.id("ires"));
List<WebElement> searchResults = resultSection.findElements(By.tagName("li"));
assertEquals(11, searchResults.size());

// Let’s ensure that the first result shown is the weather widget
WebElement weatherWidget = searchResults.get(0);
assertTrue(weatherWidget.getText().contains("Weather for San Francisco, CA"));
}
}

Now let’s see our test in action! WebDriver will create a WebView with the same configuration as the Android browser in the main UI thread, i.e. the activity thread. The activity will display the WebView on the screen, allowing you to see your web application as the test code is executing.

Interaction Testing

We’ve mentioned that WebDriver supports creating advanced gestures to interact with the device. Let’s use WebDriver to throw an image across the screen by flicking horizontally, and ensure that the next image in the gallery is displayed.

WebElement toFlick = driver.findElement(By.id("image"));
// 400 pixels left at normal speed
Action flick = getBuilder(driver).flick(toFlick, 0, -400, FlickAction.SPEED_NORMAL)
.build();
flick.perform();
WebElement secondImage = driver.findElement(“secondImage”);
assertTrue(secondImage.isDisplayed());

Now, let’s rotate the screen and ensure that the image displayed on screen is resized.

assertEquals(landscapeSize, secondImage.getSize())
((Rotatable) driver).rotate(ScreenOrientation.PORTRAIT);
assertEquals(portraitSize, secondImage.getSize());

What if your test reveals a bug? You can easily take a screenshot for help in future debugging:

File tempFile = ((TakesScreenshot) driver).getScreenshotAs(OutputType.FILE);

Find Out More

If this has whetted your appetite and you’d like to know more, go ahead and install the Android WebDriver, take a look at the documentation on the Selenium project’s wiki, or just browse the javadocs. For questions and feedback not only of the Android WebDriver but also its desktop brethren, please join webdriver@googlegroups.com. For announcements keep an eye on http://seleniumhq.wordpress.com/.

You have read this article with the title October 2011. You can bookmark this page URL https://azaquery.blogspot.com/2011/10/introducing-android-webdriver_26.html. Thanks!
Tuesday, October 25, 2011

Changes to Library Projects in Android SDK Tools, r14

Last week, we released the SDK for Android 4.0 and a new set of developer tools, now in revision 14. The updated tools include a lot of build changes, many that improve build performance. Also included is an under-the-hood change in how libraries are used by main projects — a first step in improving library support and code reusability. While the change should have little impact on existing projects, some developers have had issues when migrating to the updated tools. Please read below for more information about the change to library projects and how to solve migration issues.

Previously, library projects were handled as extra resource and source code folders to be used when compiling the resources and the application’s source respectively. While this worked fine for most cases, there were two issues.

1. Developers asked us for the ability to distribute a library as a single jar file that included both compiled code and resources. The nature of Android resources, with their compiled IDs prevented this.

2. The implementation of the library projects was extremely fragile in Eclipse. Adding extra source folders outside of the project folders is non-trivial when it needs to be handled automatically, in a way that doesn’t expose a user’s local installation path (which is required for people working in teams through a source control system such as SVN or git).

For r14, we decided to fix both issues at once, by moving to a compiled-code based library mechanism. This solves the implementation fragility in Eclipse and will allow us to, later, enable distribution of libraries as a single jar file.

As you might have seen in the release notes, moving to this new mechanism can affect existing projects in some cases, but there are simple fixes.

The first impact of this change is that the new library project requires the resource IDs generated by libraries to be non final. This prevents the Java compiler from inlining the values in the library code, and therefore prevents usage of the switch statement in the library code. To address such occurrences in your code, Eclipse provides a refactoring action to convert from switch statements to if/else (see here).

Second, some projects may not have been properly migrated to the new mechanism, resulting in projects that fail to compile, with errors such as duplicated classes being added in the dex build step. ADT 14 should have migrated older projects to the new mechanism but the fragility of the old mechanism may have prevented it from happening. This makes projects reference the libraries twice, using both the old and new mechanisms, which then triggers the libraries classes being packaged twice. If you see this in your projects, look in the Package Explorer for extraneous source folders named with the pattern <libraryname>_src. The screenshot to the right shows an example of this.

To fix the project, you must remove the extraneous source folders with the following steps:

  • Right click source folder and choose Build Path > Remove from Build path
  • A dialog will pop up. In it, make sure to check “Also unlink the folder from the project” to completely remove the folder.

With this change to library projects, we pave the way to better support for reusable components. We will continue working to make components easier to create, work with, and manage. Our goal is to make it easy for developers to create apps with great user experiences that easily adapt to all form factors.

Some developers have also told us that they only use library projects internally, that they don’t need to distribute binary versions and would prefer to continue with a source-based mechanism. We are investigating how we could support this alongside the new mechanism.

Finally, I wanted to point out that we are tracking a few known issues (and workaround for them) in the current r14 tools at this page: http://tools.android.com/knownissues.

We are working on a tools update that will include fixes for most of these. We are hoping to have it out shortly.

You have read this article with the title October 2011. You can bookmark this page URL https://azaquery.blogspot.com/2011/10/changes-to-library-projects-in-android_25.html. Thanks!
Thursday, October 20, 2011

New Public APIs in ICS

Since Android is open-source, anyone can look at the code and see how it works inside. If you do this, you’ll notice that most but not all of the APIs are publicly documented.

If they’re publicly documented, they’re part of what we consider the Android Application Framework. This means their tests appear in the Compatibility Test Suite (CTS) so that our hardware partners have to prove that the APIs work, and that we promise to try very hard not to change them and thus break your code.

In almost every case, there’s only one reason for leaving APIs undocumented: We’re not sure that what we have now is the best solution, and we think we might have to improve it, and we’re not prepared to make those commitments to testing and preservation.

We’re not claiming that they’re “Private” or “Secret” — How could they be, when anyone in the world can discover them? We’re also not claiming they’re forbidden: If you use them, your code will compile and probably run. And in fact we know of quite a few apps out there whose developers have used undocumented APIs, often to good effect. It’s hard to get too upset about this in cases where there’s a useful API that we haven’t gotten around to stabilizing.

But the developers who use those APIs have to be prepared to deal with the situation that arises when we move them from the undocumented outside into the Android Application Framework. Fortunately, this is reasonably straightforward. Also we take a close look at Android Market, using our in-house analytics tools, to get a feel for the impact when we know one of these changes is coming.

There are a few such changes coming up in the Android 4.0 “Ice Cream Sandwich” (ICS) release of Android. We wanted to take the opportunity to combine these words on undocumented APIs with some specifics about the changes.

Calendars

Let’s start with the good news: As of ICS, the Android Framework will include a fully-worked-out set of APIs for accessing Calendar data. You can guess the bad news: Quite a few developers have built apps (including many good ones) using the undocumented Calendar APIs, some using fairly low-level access to the calendar database. Unfortunately, these integrations were unsupported, and prone to breakage by platform updates or OEM customization of calendar features.

We want to see lots of good calendar apps and extensions that work reliably across Android devices, and aren't broken by platform updates. So we decided to create a clean API, including a comprehensive set of Intents, to manage calendar data in ICS. Now anyone can code against these new APIs and know that Android is committed to supporting them, and that partners have to support these APIs as part of CTS.

Once the new APIs arrive, you’re going to have to update your apps before they’ll run correctly on ICS while still working on older releases. There are a variety of techniques for doing that, many of which have been featured on this blog, including reflection and lazy loading. Recently, we introduced Multiple-APK support, which could also be used to help with this sort of transition.

Text To Speech

Android has never really had a text-to-speech API at the Framework level, but there was unofficial access at the C++ level. With ICS, we will have a fully-thought-through application-level API running on Dalvik, so you can access it with ordinary Java-language application code.

The old C++ API will no longer be supported, but we’ll have a compatibility layer that you can use to bridge from it to the new API. We think it should be easy to update for ICS with very little work.

Doing the Right Thing

We recognize that this means some work for developers affected by these changes, but we’re confident that Android programs in general, and both Calendar and TTS apps in particular, will come out ahead. And we also think that most developers know that when they use undocumented APIs, they’re making a commitment to doing the right thing when those APIs change.

You have read this article with the title October 2011. You can bookmark this page URL https://azaquery.blogspot.com/2011/10/new-public-apis-in-ics_20.html. Thanks!
Tuesday, October 18, 2011

Android 4.0 Platform and Updated SDK Tools

ICS logo

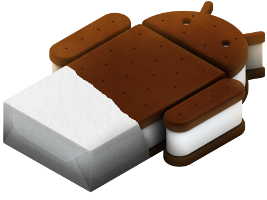
Today we are announcing Android 4.0, Ice Cream Sandwich — a new version of the platform that brings a refined, unified user experience for phones, tablets, and more.

Android 4.0 builds on the things people love most about Android — efficient multitasking, rich notifications, customizable home screens, resizable widgets, and deep interactivity — and adds powerful new ways of communicating and sharing. It includes many great features for users, including social and sharing integration, network data usage control, innovative connectivity and camera options, and an updated set of standard apps.

For developers, Android 4.0 introduces many new capabilities and APIs. Here are some highlights:


Unified UI toolkit: A single set of UI components, styles, and capabilities for phones, tablets, and other devices.

Rich communication and sharing: New social and calendar APIs, Android Beam for NFC-based instant sharing, Wi-Fi Direct support, Bluetooth Health Device Profile support.

Deep interactivity and customization: Improved notifications, lockscreen with camera and music controls, and improved app management in the launcher.

New graphics, camera, and media capabilities: Image and video effects, precise camera metering and face detection, new media codecs and containers.

Interface and input: Hardware-accelerated 2D drawing, new grid-based layout, improved soft keyboard, spell-checker API, stylus input support, and better mouse support.

Improved accessibility: New accessibility APIs and text-to-speech APIs for writing new engines.

Enhancements for enterprise: Keychain and VPN APIs for managing credentials and connections, a new administrator policy for disabling the camera.

For a complete overview of what’s new for users and developers, please read the Android 4.0 Platform Highlights.

Alongside the new Android platform, we are releasing new versions of the SDK Tools (r14) and ADT Plugin (14.0) for Eclipse. Among the highlights are:

  • Improved build performance in Ant and Eclipse

  • Improved layout and XML editors

To get started developing on Android 4.0, visit the Android Developers site for information about the Android 4.0 platform, the SDK Tools, and the ADT Plugin.

If you have already developed and published apps, we encourage you to download the Android 4.0 platform now, to begin testing your app before devices arrive in stores.


Check out the video below for a closer look at Android 4.0 in action.


You have read this article Android 4.0 / Announcements / SDK updates with the title October 2011. You can bookmark this page URL https://azaquery.blogspot.com/2011/10/android-40-platform-and-updated-sdk_18.html. Thanks!
Sunday, October 16, 2011

Using ffmpeg to record screencasts compatible with Vimeo


Summary:


This command breakdown explains the ffmpeg command specific to screen captures using h.264 and mp3 lame.

This command line procedure captures your left hand screen using h.264 high quality capture settings. Your audio is encoded in mp3, and is captured in 320mb/s 44100 khz audio from your default laptop audio mic, or from a headset with a mic jack.

Prerequisites:

Set Default Monitor:


  1. Open gnome-display-properties (System > Preferences > Monitors)
  2. Drag the screen you want to capture to be on the left.
  3. Click the left monitor in the dialog.
  4. Write down the resolution displayed. This is required in the command line procedure.
  5. Click Set As Default.
This now sets the record target display as 0.0, or DEFAULT.

Get Packages:

Install Codecs from RPM Fusion Non-free repo
  • Install the @rpmfusion-nonfree repo
  • sudo yum install ffmpeg lame-devel
Install Codecs from RPM Fusion Free repo
  • sudo yum install h264enc x264 x264-devel

Background:


The ffmpeg command is broken down into the following primary parts:
  • input
  • output (encode)
  • output container (filename).

To record your desktop, you require two input sources to be configured:
  • Audio from your laptop mic, USB headset, or 3.5 minijack microphone/headset
  • Video from the desktop of your computer.

Input

Audio Input Parameters

  • -f alsa (specify an input format for alsa audio)
  • -i plughw:0,0 (specify the input type for the default internal sound card (mic pickup in laptop, or if you are using a mic connected to the mic jack such as the one for the Logitech H230)
    NOTE:
    • If you are using a USB headset or mic, plug in the device and run “cat /proc/asound/cards”
    • You will get a listing of plugged in sound cards.
    • change “plughw:0,0, to plughw:[n],0. Where [n] corresponds to the sound device you just plugged in.

Video Input Parameters

  • -f x11grab (specify an input format of X11 Screen Capture)
  • -s 1680x1050 (specify screen’s resolution. Note there are NO SPACES in resolution)
  • -r 24 (specify a framerate of 24 fps)
  • -b 100k (specifies the framerate capture. Although Vimeo recommend bitrate to be 5000, ffmpeg doesn’t
  • -bf 4 (specify the MPEG B-frame type you want to capture is for MPEG-4. Other options are BF 1 for MPEG-1 and BF 2 for MPEG 2). You are recording to MP4 format, so select MP4 to match).
  • -g 15 (specify “Groups of Pictures” to have PAL compression [NTSC is 16])
  • -i :0.0+0,0 (0.0 specifies the $DEFAULT (system default) monitor display. The second set of numbers after the + specify the offset value from the left-hand display. So if you want to capture the second screen, and the L/H monitor runs 1680x1050, the offset value is 1680). The setting as specified captures the left screen.

CRUCIAL: -s and -r *must* appear before -i on the command line. You are passing the frame rate and screen resolution *to* the display and capture area. Place it after -i and you are specifying these values for the *next* input format.

Output

ffmpeg output properties are set using codecs and their specific settings. You need settings for both Audio and Video.

Specify the Output (encode) properties in the order you specified the input types:

Audio Output Parameters

  • -acodec libmp3lame (specifies that you will encode using mp3 libraries. These encode fine when pushed to Vimeo.)
  • -ar 44100 (specifies the audio frequency is 44100 khz, which is the Vimeo maximum)
  • -ab 320k (specifies the audio bitrate is 320kbps, which is the Vimeo maximum)

Video Output Parameters


  • -vcodec libx264 (specifies the h.264 codec)
  • -vpre lossless_fast (specifies lossless fast encoding is used. You don’t need to use lossless_medium or lossless_high to get better quality.

Output Container

Finally, the output file name, which is added as the last command line argument. Ensure it has the .mp4 container extension in the name.

Usage Example

ffmpeg -f alsa -i plughw:0,0 -f x11grab -s 1680x1050 -r 24 -b 100k -bf 4 -g 15 -i :0.0+0,0 -acodec libmp3lame -ar 44100 -ab 320k -vcodec libx264 -vpre lossless_fast Desktop_Recording.mp4


This captures the left screen at 1680x1050 resolution. The framerate is 24fps. The audio is encoded in MP3 format at 44100 khz / 320kbps. The file saved is Desktop_Recording.mp4, and is saved in the same directory you executed this command in.


To stop the recording, press Ctrl+C. in the termnal.
You have read this article ffmpeg / Screencasting / Vimeo with the title October 2011. You can bookmark this page URL https://azaquery.blogspot.com/2011/10/using-ffmpeg-to-record-screencasts.html. Thanks!
Thursday, October 13, 2011

recordMyDesktop and HandBrake for Vimeo

I've decided to create some screencasts about my favourite XML WYSIWYG editor, Serna Free (by Syntext Software).

This is mostly to educate new users to of the program how to get the most out of this powerful WYSIWYG editor.

There was a first step that needed to happen before doing that though, and that was covering how you can use open source screen-casting tools and conversion utilities to get output that Vimeo can upload.

I've created a Vimeo screen-cast about using recordMyDesktop and converting the Ogg Vorbis output to h.264 using Handbrake.


This video will play best when you view it in full-screen mode (icon next to the HD symbol) and activate HD mode.

I hope it helps you do some screen-casts of your own on fedora.
You have read this article HandBrake / recordMyDesktop / Screencasting / Vimeo with the title October 2011. You can bookmark this page URL https://azaquery.blogspot.com/2011/10/recordmydesktop-and-handbrake-for-vimeo.html. Thanks!
Wednesday, October 5, 2011

Android Market Featured-Image Guidelines

[This post is by Natascha Bock, a Product Marketing Manager on Android. — Tim Bray]

With the latest Android Market update, our editorial team can use your 1024 x 500 “Featured Image” to promote your app on tablets, phones, and the Web. The image can be used on the home page on all versions of Android Market (Web, tablet and phone), on your product page in the Web and tablet versions, and on current and future top-level Android Market pages on phones.

Creating a Featured Image that will do a great job of highlighting your app requires special design consideration.

Not Really Optional

While many promotional assets are listed as “optional” for the publishing site, we strongly recommend treating them as required. To start with, a Featured Image is required if your app is to be featured anywhere within Android Market. They’re a good idea anyhow; they enhance your product page, making your game or app more attractive to end-users (and more likely to be considered for featuring by our editorial team).

There’s nothing optional about the size, either; it has to be 1024 x 500 pixels.

Do’s and Dont’s

Your graphic is not an ad, it’s a teaser. It’s a place for bold, creative promotional images.

Vivid background colors work best. Black and white are problems because those are the backgrounds used by the mobile-device and Web versions of Android Market.

Limit Text to your app name and maybe a few additional descriptive words. Anything else will be unreadable on phones, anyhow.

Do: Make the graphic fun
and enticing.
Don't: Create a text-heavy
advertising-style graphic.
Do: Use colors that stand out on
black or white backgrounds.
Don't: Let the graphic fade into
the background.
Do: Promote your brand prominently.
Don't: Overload the graphic with details.

Scaling

Your image has to be designed to scale; it will need to look good both in a full-size Web browser and on a little handset. You can rely on the aspect ratio being constant, but not the size. Here’s a tip: Try resizing your image down to 1 inch in width. If it still looks good and conveys your brand message, you have a winner.

On the Web:


On a tablet:


On a big phone:


On a small phone:

More Dont’s

  • Device imagery is tempting, but becomes dated fast, and may be inappropriate if your user’s device looks entirely different.

  • In-app screenshots are inappropriate because your product page already includes a place for these.

  • Just using your app icon is a failure of imagination. You have more room; put it to good use!

Consider the Context

Given the size of the form factor, the phone is the most challenging channel for your image. Below we have both the “good” and “bad” sample images in that context:

Don’t Forget

A 1024 x 500 Featured Image is required for feature placement consideration. Don't miss out on the opportunity!

You have read this article with the title October 2011. You can bookmark this page URL https://azaquery.blogspot.com/2011/10/android-market-featured-image-guidelines_5.html. Thanks!
Monday, October 3, 2011

Using Open Source to Reinvigorate Pinball 2000

I remember when I was restoring pinball machines that I learned a very important lesson about computer repair. I accidentally caused mainboard damage to a Pinball 2000 (Pin2K) game: Star Wars Episode 1.  It is very easy to do, because the two Molex connectors from the ATX power supply were not keyed, and you could reverse the ground for power. I did this, and took out the power circuit on the mainboard.

This was a *big* problem, because the Pin2K mainboards were a BAT style PC mainboard running a Cyrix Media GX CPU which was connected to a Cyrix CX5520 bridge. These motherboards were used mainly in set-top boxes such as cable TV systems.

The Pin2K series used a PCI custom card called a PRISM card. This card contained all the game logic, sound effects, and video packages for the games. If the power spike travelled to the PRISM card, you basically had yourself a fantastic $8000 piece of furniture.

At the time, the machine was mothballed.

I recently discovered that Big Guys Pinball have reverse engineered the Pin2K core, and created some custom boards which can be used to replace damaged Pin2K logic box systems. The new system is called nucore.

The great thing is they are using Linux (Ubuntu 8), and COTS motherboards and Video Cards, to make this system a reality. You can purchase the components separately, or as a plug-and-play system ready for production use.

The more exciting part to this development is that talks are currently happening to continue Pin2K development. When Williams wrapped up production in 1999, two tables were mothballed. Talks are now underway to commence production of Wizard Blocks, and Playboy.

I will be very interested to see if the cost of production will discourage production of these tables. Some of the challenges with these new tables is the fact that some game logic and a lot of artwork is missing.

Hooray for Open Source, and Ingenuity!
You have read this article Big Guys Pinball / Linux / nucore / Open Source / Pin2K / Pinball 2000 with the title October 2011. You can bookmark this page URL https://azaquery.blogspot.com/2011/10/using-open-source-to-reinvigorate.html. Thanks!